Processing Automatic Payments
-
Navigate to the Processes App > Process Center.
-
Locate the Ecommerce.AutoPay process and click the Details button. The Ecommerce.AutoPay Profile will appear.
-
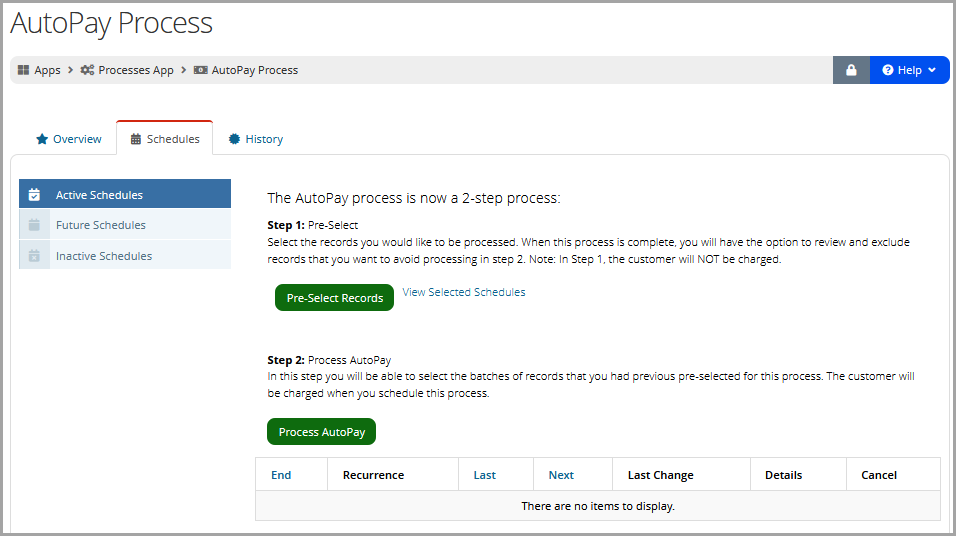
Click the Schedules tab > Active Schedules menu option.
-
Under Step 1, click the Pre-Select Records button to choose record types to include in the Auto-Pay Process.
-
-
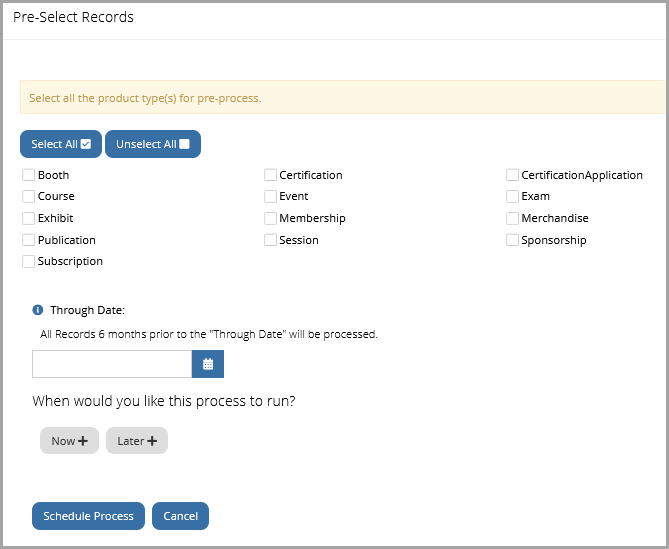
In the Pre-Select Records form,
-
Use the check boxes to select product types to be included in the process.
-
Select the Through Date. (All records 6 months prior to the Through Date are included.)
-
Choose when the process should be scheduled to run.
-
Click Schedule Process. The Preselect Records form will close.
-
Note: Processes scheduled for the future can be updated via the Ecommerce.AutoPay Profile > Schedules tab > Active Schedules menu option, by clicking the View Selected Schedules link. Choose the Future Schedules menu option and click the Details button next to the schedule to be edited.
A schedule can also be run immediately or canceled from this screen.
An email will be sent to the user initiating the process, indicating that the process has started. Another email is sent once the process is complete.
Once the process is complete, return to the Ecommerce.AutoPay Process Record > Schedules tab > Active Schedules menu option.
-
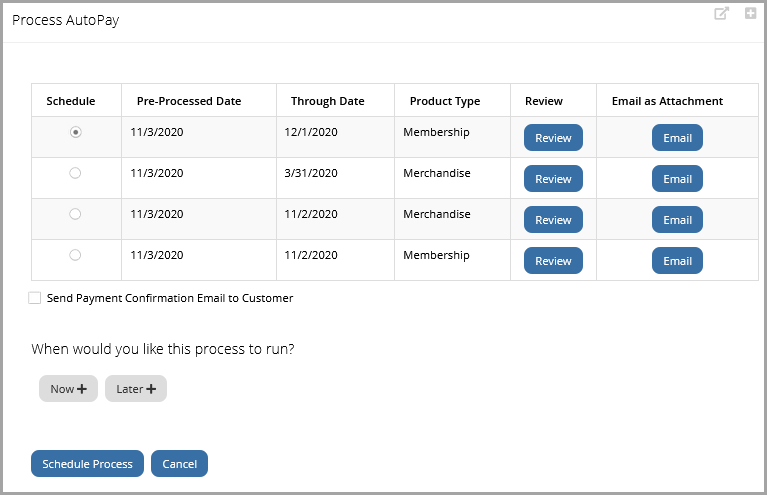
Under Step 2, click the Process AutoPay button. The Process AutoPay window will appear.
-
The table at the top of the window lists any schedules processed in Step 1 ready to be finalized in Step 2. Choose the desired schedule by selecting the radio button in the Schedule column.
-
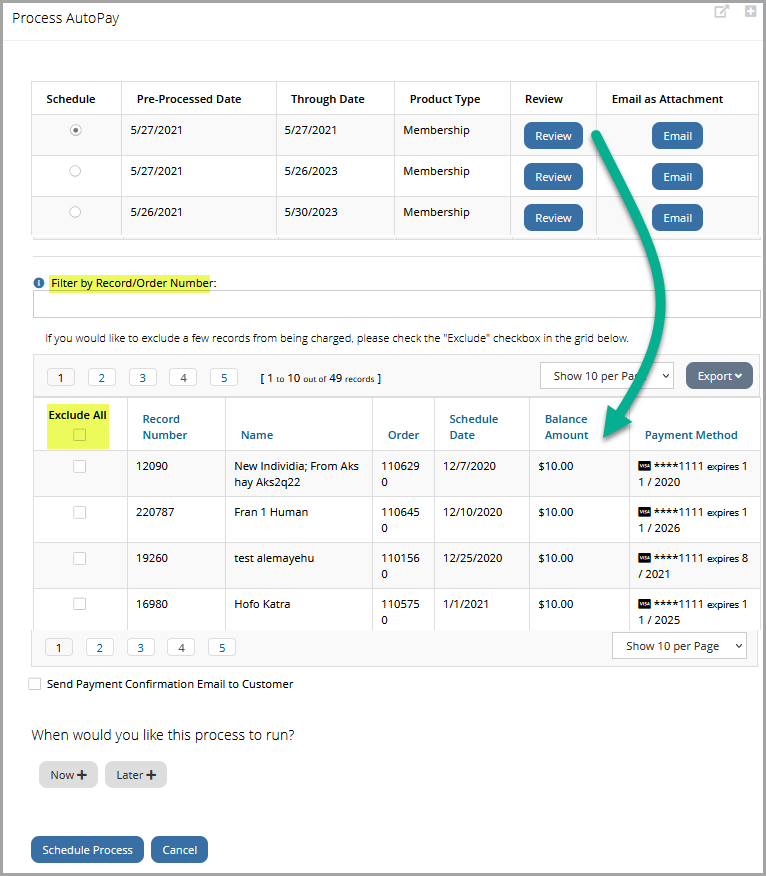
To view a list of all orders included in the selected auto pay schedule, click the Review button next to the schedule to be run. A list of records included in the process appears at the bottom of the window.
Staff can use this list to look up and exclude specific records.
-
Choose when the process should run.
-
Click the Schedule Process button.
Once scheduled, the process will appear in the table under the Step 2 section.