Configuring the Waitlist
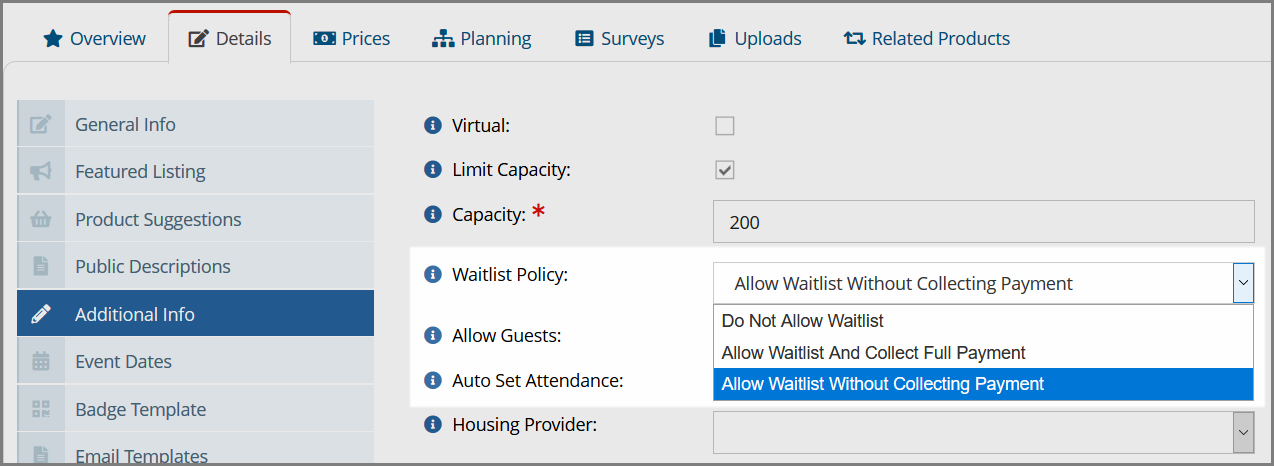
Waitlist functionality can be enabled per event, in the Event Record > Details tab > Additional Info menu option. When an event is limited by capacity (by clicking the Limit Capacity check box), the Waitlist Policy setting allows staff to enable one of the following options:
- Do Not Allow Waitlist: This option disables waitlist functionality for the event.
- Allow Waitlist and Collect Full Payment: Collect the full event registration fee from users signing up for the waitlist.
- Allow Waitlist without Collecting Payment: Registrants will be added to the waitlist, but will need to pay an open balance on the registration before being promoted to registrant.
When the waitlist is allowed, staff can specify the text of the "Waitlist" and "Out of Waitlist" emails, from the Event Record > Details tab > Email Templates menu option.
The “top” and “bottom” portions of these emails can be customized by staff on the Event Record. The middle portion automatically displays the registrant name and event name (as well as session name(s), if applicable), but the message displayed in this section can be customized—reach out to support@impexium.com for assistance in configuring that message.

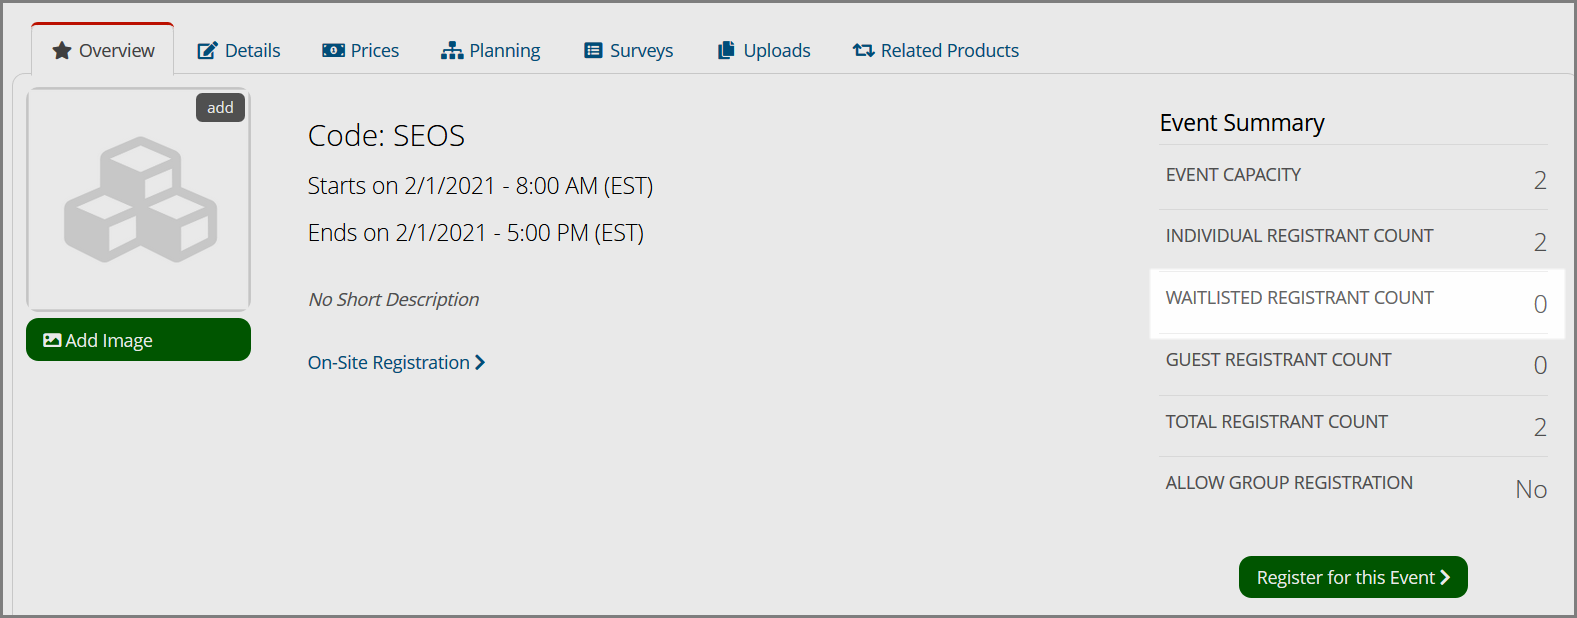
Waitlisted registrants are visible on the Event Record and on Session Records, via the Overview tab. The Waitlisted Registrant Count lists the number of registrants currently waitlisted while the Total Registrant Count lists the number of registrants confirmed.
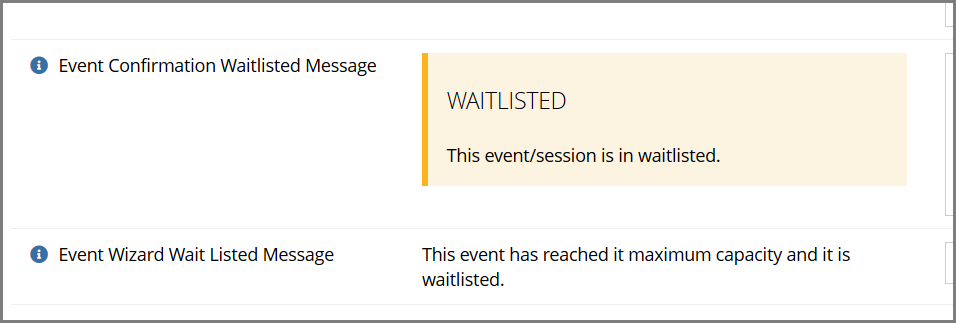
During the registration process, if the event is at capacity and waitlisting is allowed, a message will appear at the top of the Event Registration Wizard, indicating that the registrant will be added to the waitlist. This message can be configured in the Configuration App > Shopping section, using the setting Event Wizard Wait Listed Message. On the Order Completion screen, purchases of waitlisted events and sessions display the indicator set up under Event Confirmation Waitlisted Message.
A "Waitlisted" tag appears when waitlisted registrations are viewed in the following areas:
-
On the registrant Individual Record > Purchases tab, under Events,
-
On the registrant's Event Registration Detail / Purchase Profile page, next to the waitlisted event and/or session(s) are waitlisted
-
On the Order and Invoice Records for the purchase of the waitlisted event and/or session(s).
Managing the Waitlist
The full list of waitlisted registrants for an event is visible on the Event Record > Planning tab > Waitlist menu option. The Manage button is available next to each registrant in the waitlist.
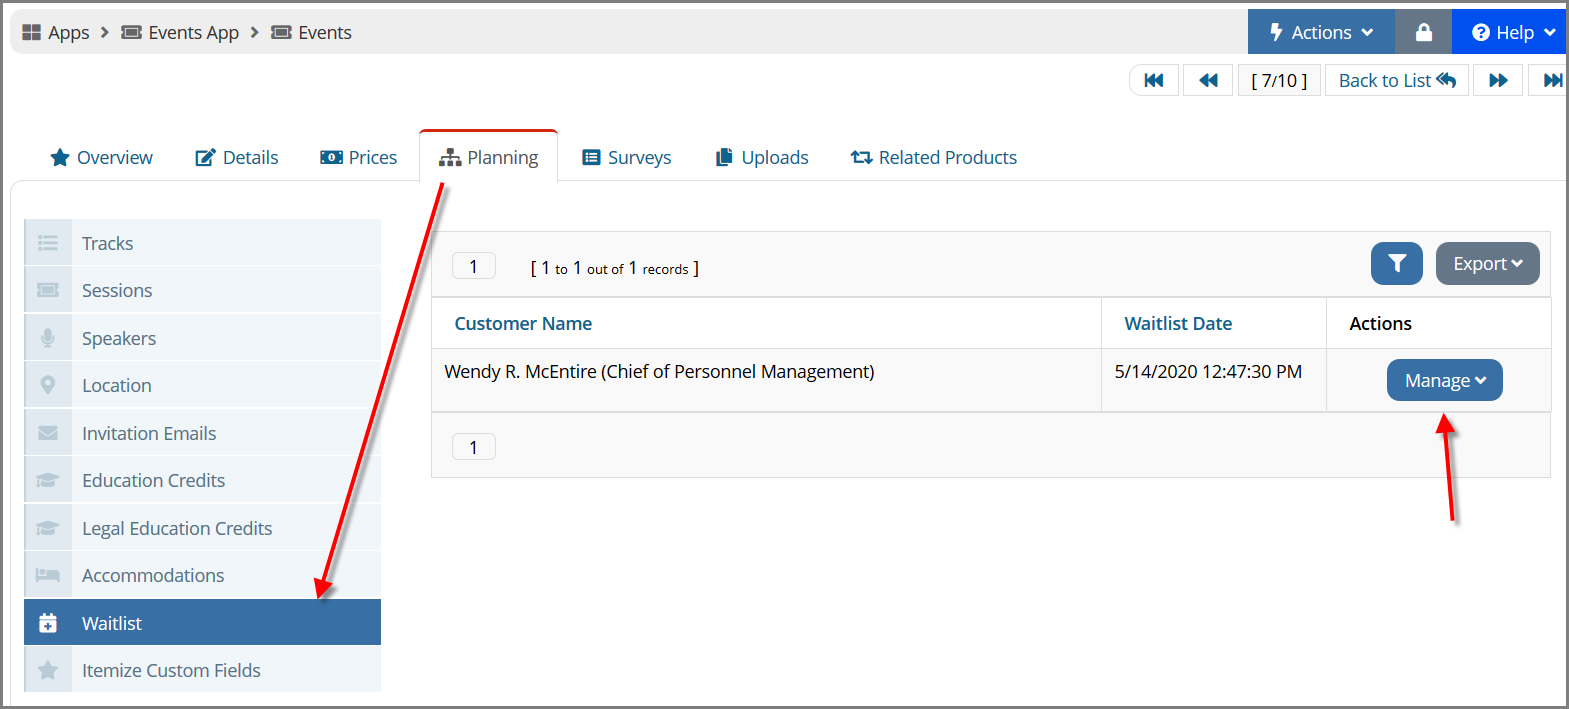
Click Manage to expand a drop-down with the following options:
- View: Open the Event Registration Detail page for this registrant.
- Confirm: This option promotes the registrant off of the waitlist and onto the list of event registrants. It is only possible to promote a waitlisted registrant if space is available, either due to a cancellation or an increase to the event capacity. If a balance is due on the confirmed registration, clicking Confirm will open the Payment Wizard and allow staff to accept payment for the registration.
- Remove: Waitlisted registrants that ultimately do not receive an attendance slot will need to be removed from the waitlist. If payment has not been collected for the waitlisted registration, clicking the Remove option will allow staff to void the waitlisted registration. If payment has been collected, the registration will need to be canceled (from either the Registration Details page or the Invoice) and payment returned.
At this time waitlisted registrants cannot be automatically moved from the waitlist—this is a manual process.