Setting up Product Prices
When creating prices, there are several useful tips to keep in mind:
-
All products must have a price. Even free or zero cost products must have a zero dollar price associated with them.
-
One product can have multiple prices. If you wish to offer different prices to different customer types, multiple prices can be created and differentiated using price attributes. For example, one product could have Price A for members of a certain committee, Price B for members only, and Price C for all other customers.
-
Customers see the lowest price they qualify for.
-
Prices are only active during their Availability Date range. If a price is inactive, it will not function.
Prices can also be set as taxable or nontaxable, deferred, prorated, can be set to allow a customer to pay by installments, or allow customers to choose "Bill Me" during checkout.
To view and create prices:
-
Navigate to the Product Record. "Products" include Events, Memberships, Merchandise, and more. Anything that can be sold in the system is considered a product.
-
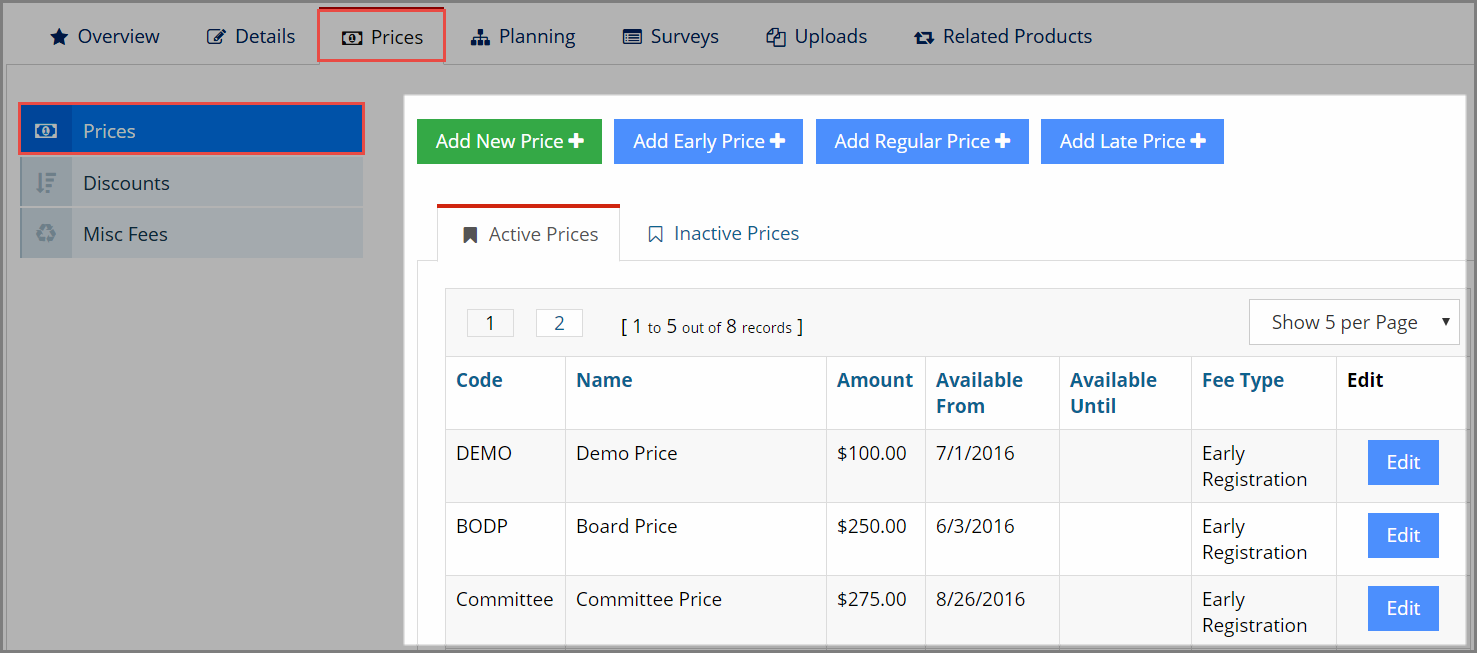
Click the Prices tab.
-
Select the Prices menu option.
If any prices have already been created for this product, they will appear under the Active Prices and Inactive Prices tabs. Prices with Available From and Until dates that fall within the current date range appear under Active Prices. Prices that do not fall within the current date range appear under the Inactive Prices.
-
Click Add New Price. The Add Price form will appear. (Required fields are marked with an asterisk.)
Note: When configuring prices for certain product types, available options may be slightly different depending on product features. For example, for event prices, staff may see buttons to add Early, Regular, and Late prices. When configuring rate card prices, the option to choose an ad position, color, and size will be available.
-
Position, Color, and Size (Rate Cards Only): These settings allow staff to create prices for multiple different ad positions, colors, and sizes on one rate card.
-
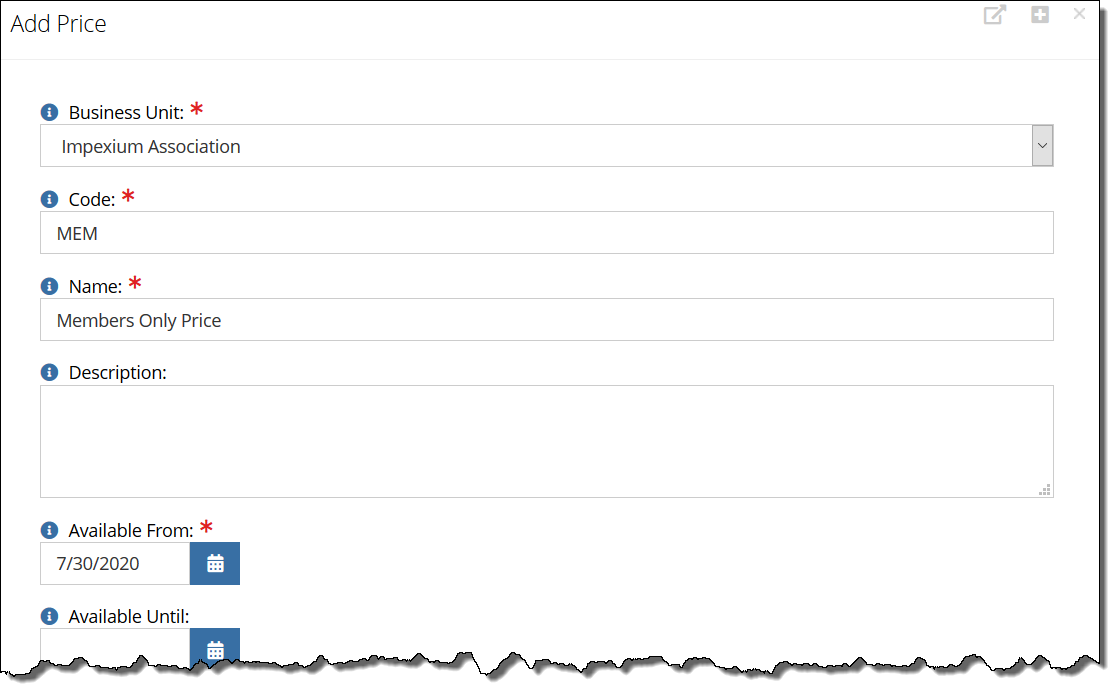
Business Unit: If multiple business units exist in your system, choose the appropriate one for the price being created. The business unit selected here determines the accounts selectable at the bottom of the Add Price form.
-
Code and Name: Create a brief but descriptive Code and Name for the price. This code and name is defined by you, but should be descriptive and indicate the type of price being created and the customer to receive the price.
-
Description: Create an optional description of the price—this can be used to indicate in more detail the intended recipient and function of the price for staff users.
-
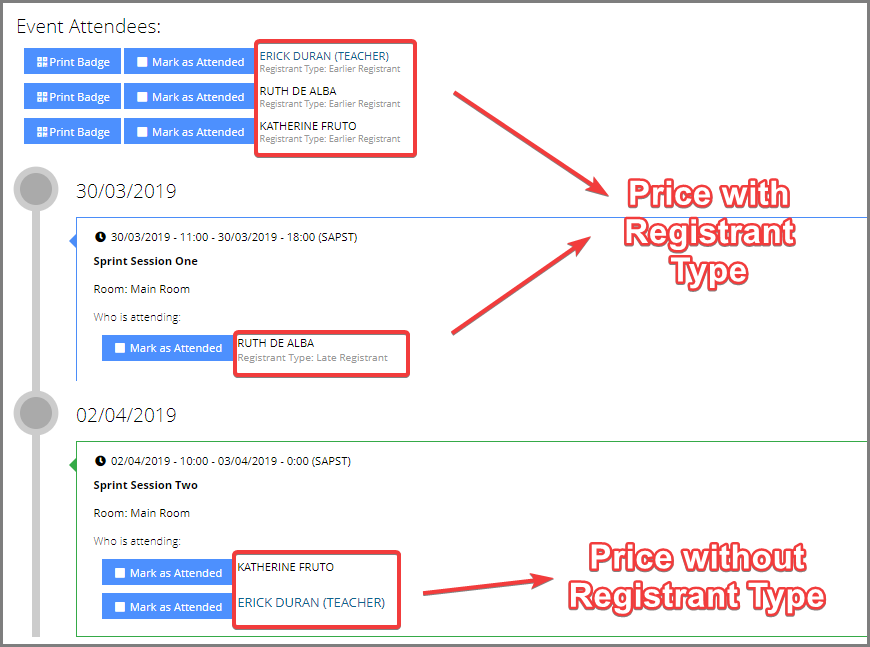
Registrant Type (Events Only): These registrant types can be configured to display a certain registrant type label next to the registrant name, on the confirmation email, and in certain reports

-
Available From and Until: Use these calendar fields to indicate the date range during which the price should be active.
These fields are especially useful in creating early, regular, and late registration date prices for events and for running promotions for a period of time. The Available Until is not required, and can be left blank if the price should be active indefinitely.

-
Has Formula (Membership and Event Products Only): Clicking this check-box indicates that the price being created should refer to your organization's membership dues formula, and causes the Amount field to disappear.
Configuration of a formula is typically only required if the required price configuration cannot be accomplished via price attributes. Contact your re:Members AMS support representative to set up this dues formula if necessary.
-
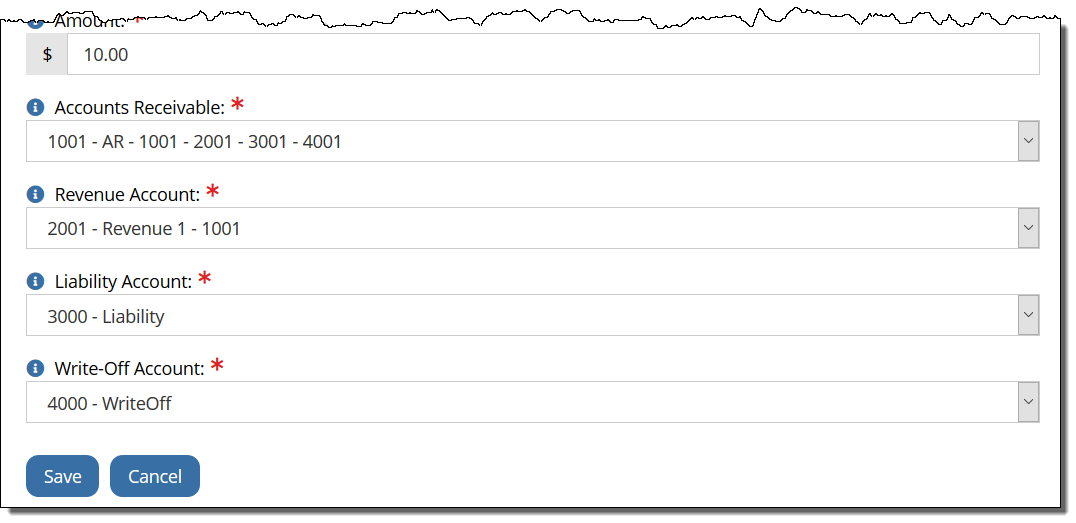
Amount: Enter the amount of the price in this field.
Note: Default account details for each product type (event registration, membership, merchandise product) can be set, in advance, via the Accounting App. (See Setting Default Product Type GL Accounts.)

-
Accounts: Once the Business Unit is selected, choose the appropriate AR, Revenue, Liability, and Writeoff account from the drop-down fields.
-
Click Save.
The Add Price confirmation pop-up will appear. This window details the AR, Revenue, Liability, and Write-off accounts selected for the price created.

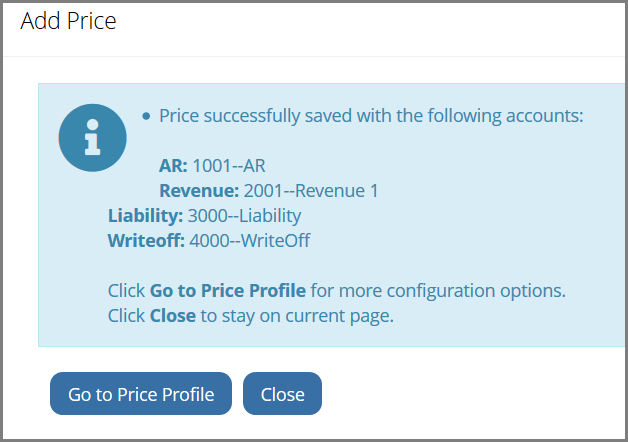
Click the Go to Price Profile button to set up additional price options. Staff can also click Close to return to the product . The Price Record is accessible via the Prices tab of the Product Record, by clicking the Edit button next to the desired price.
Once the price has been created, you can apply price attributes, modify the price split, and specify other price settings, such as whether it is taxable, deferred, and more within the Price Profile.
Note: For information on copying prices, see Copying Prices.